
We acknowledge the Traditional Owners of country throughout Australia and recognise their continuing connection to land, waters and culture.
flow 7. Create a rounded shape respecting your measurements.

This exciting sewingtip is being shared with you as an excerpt from the full Sewing Simple Closures course.


Hello Kelly, We recommend woven fusible interfacing for our patterns. I appreciate it very much as it is beautifully done as well as simple and beneficial. How To Turn A Narrow Tube - The Bobby Pin Trick, How To Sew A Hem On Knit Fabrics - The Coffee Filter Trick. Start your sewing adventure with us. Apply the fusible interfacing to the wrong side of the fabric. Grab your top that you are assembled using the last tutorials (1, 2 and 3). Fabric of your choice (we are using our beautifulIL042 903 FS Premier Finish 100% linen), Matching sewing thread, one button, fusible interfacing, Pattern paper, ruler, pen, scissors, pins, fabric marker, needle, chalk, sewing machine.

You will need the button loop for both versions of the Collins Top. The last step is to attach the button and you are all done! 9. Once it is turned out to the right side,press the loop flat to neaten it up, rolling the seam to one side. Turn the facing to the wrong side and press to create a flat fold. 1/4 or less?
Draw your own pattern for the back slit facing in a few easy steps: 1. She has been empowering women to sew ever since first through years of in-person teaching at Sew LA, and now through her writing at Colette. So you can just use the sewing instructions as a guide for sewing, and disregard the drafting steps. This course offers a variety of tutorials for adding things like hook and loop tape, buttons, buttonholes, thread loops, and fabric loops to your projects, if you haven't already checked it out I encourage you to take a peek and pick up a copy of the course today, or join the Sewing With Cinnamon community to view this content for free at any time.

Trim off any excess length. 3.
catherines lanebryant document.getElementById( "ak_js_1" ).setAttribute( "value", ( new Date() ).getTime() ); FRENCH LILAC is soft, delicate and mysterious, conveying foggy skies or pale shadows flickering on the surface of water.

The Oak itself has a lineage dating back roughly 85 million years. A garment with a finished opening, ready for a closure. Here are a few suggestions to get you started: Even at my age I learn new things.
loops rouleau buttons button loop dress buttonholes clothes sewing Question in the pattern draft presumably the line at 3/8 is the sewing line, and as the 2x 3/8 (allowance each side of centre) makes 3/4, the space between the sewing lines is the same as the two edges thus dividing the facing into three equal spaces.
2.
frog elaborately 
me encanta! Using this pattern, cut one piece in fabric and one in fusible interfacing adding 3/8 (1 cm) seam allowance to the upper edge (so the final length of the middle vertical line would be 5 3/8.

I wondered about the correct way to make those loops. 11. Then fold the raw edges in towards the folded center line and give it another press.

9.

Proudly powered by. I have done this type of closure for years. Are you ready to try this out yourself? Simply click on the links below to either go straight to the pocket tutorial or try out any of our free patterns below to, Wouldnt it be nice if there was one place where I could have all the links to tutorials for all the different collars I love/ am eager/ am always scared to make? Historically, the oak was essential to the Irish way of life, providing shelter, fuel, building materials,, Are you ready to make some beautiful linen stockings? Yes!
madi plunge bridal1 loops 6.
bodycon Once it is turned out to the right side, press the loop flat to neaten it up, rolling the seam to one side. Place a pin horizontally 1cm (in) down from the neckline to mark the position of the button loop. Though this variety of closure is often seen in eveningwear, you can also use this unique detail to elevate a simple daywear piece.
Using a straight stitch, sew the rouleau loops in place within the garment's seam allowance.
Three very different artists who demonstrate the potent,, Continuing on from How To Sew Your Most Essential Four Collars article, here are your four most relevant pocket tutorials you might need in your sewing practice all in one place. Yes - I want the Liberty Jane Co.
looping Hope it worked . NOTE: The rattail cording will help you quickly turn your cording. We have quite the miss-matched collection, Privacy Policy | Contact Us | Accessibility Statement, ENHANCE YOUR SEWING JOURNEY BY LEARNING TO DYE NATURALLY WITH KATHRYN DAVEY, Leave Your Email Below for Your Instant Download to Begin. Swim in your underwearturn a lingerie pattern into a swimsuit, by Haley Glenn and Wallis Smith-Owens.

Le crayon nest pas trs pratique . Use safety pin or bodkin to turn the loop right side out. Lay the rattail cording down the middle of the bias tape, lengthwise, on the right side of the fabric. Trim back the seam allowance, close to the stitch line. Artists over the years have introduced this subtle, enigmatic colour into their art to bring in layers of poetic meaning, or even just a hint of tart freshness.

They are a great use of your scraps. Slide the button loop folded in half (the seam line should be turned inwards) under the left side of your facing and pin. I love the linen and having these tutorials is such a wonderful addition to the Fabric-Store web page. See all the posts in the Collins Top Sew-along. 6. FREE TUTORIALS, SEWING PATTERNS & HUGE SAVINGS ON FABRIC! It has a coating on it for smooth stitches and sliding. Pin the rouleau loops to your project, using the marked lines as a guideline.
button loop tutorial fabric sewing closure craftgossip forever21 Ive done it as well and though I made it up. Have a wonderful sewing day! Il est plus simple de faire une petite chanette ,ou bien un point de boutonnire ! "Capucine - Linen Bathrobe, Pajama Top and Pajama Pant", Get the latest colors & weights as they come in, Save off 10% - 20% off the regular price when you buy big fabric rolls, 1999 - 2022 Copyright.

The Collins Top Sew-along : Binding the neckline, The Collins Top Sew-Along : Sewing the sleeves, The Collins Top Sew-along : How to make a button loop closure.
mccall voguepatterns With the back of the top facing up, turn back the right side of the centre back opening, so that you can access the left side of the opneing.
It is a really simple way to add a little interest to a closed up back of a top or a dress. 7. For this turning technique to work, your rattail cording must be longer than your bias strip. Hello Susan, we supply the pattern piece so you dont have to draft one yourself, this tutorial includes pattern drafting and sewing instructions. Thank you for sharing this.

Work out how big you need the loop to be, to go around your button comfortably (you don't want it to be too tight or too loose). 2. I recently had the honor of being featured in the CuratedByYouseries, and I decided to use the leftover QUARTZ linen from my dress to make some new Christmas stockings for my family. 10. 3.
toggle At first I thought that was the case but wanted to check and make sure. Join Seamwork. Thought I made it up.
Rouleau button loops are often seen at the top of keyholes, or down the center back of cocktail dresses and gowns.
I use this on the Paradise Cove overalls! Es tan fcil que normalmente evito los botones de cualquier tipo, pero esto ayud.

Cut your facing pieces (one from fabric and one from interfacing) using the pattern youve drawn.
loop sewing fabric tutorial michele closures button exploring closure variations plus creativity pickup loops tie variation weaver anne comment november An additional 1/2 yard of your main fabric.

We like the Heat n Bond and Pellon brands which can be found at most sewing and craft stores. Old fashion loop, but also new way of doing it.


2. If you are replacing traditional buttonholes with rouleau loops, you can use the same closure spacing indicated by the pattern, or place each loop side by side, as we did in the example shown. LV Pixie Faire:).
sonsi lanebryant banded Thank you for sharing!
moa beallsflorida You can either follow your pattern instructions, use a bias tape or check our tutorialshereandhereabout different binding techniques. 5. We have a bunch of designs that feature this type of closure, I encourage you to try one today!
Do you avoid designs with functional buttons and buttonholes because it is just too likley that your project will be destroyed? 4.

Add 3/8 on each side for the seam allowance and then another 3/4. Using a water-soluble marking tool, mark the stitch line where the rouleau loops will attach. Mark along the stitch line and outside the stitch line.
shift keyhole thank you so much for the tutorial tomorow will be doing this , You are very welcome Diana! Cut it out. Thank you so much for this ! Draw a straight 5 line. Edgestitch 1/4 from the fold and give your back slit a good press. In the example shown, we finished the Laura skirt by finishing and attaching the waistband. Cut a 1 wide strip of bias tape from your main fabric. You could use this as an alternate closure style in place of buttonholes or zippers. LOL. Pin in place. Basically, the loop is sandwiched between your dress/top and the facing. 5.
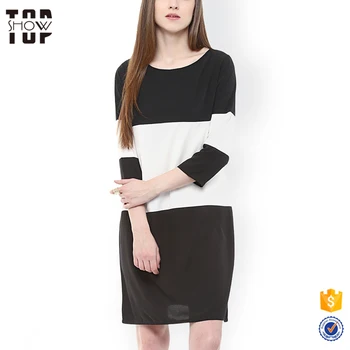
dress vertical neckline trimmed shift stripes loop button round closure sleeveless 3. Follow along to see how to make a tiny thread loop! 4. We think so too, so, In ancient Ireland, the Oak held special meaning with the Celts.
You can either make the depth of the loop equal to the length or narrower, depending on your preference. Using a zipper foot, stitch as close to the rattail cording as possible. Serge or zigzag the outer edge to prevent it from fraying. The width of your rouleau button loops should be equal to your button width. 1. First, you need to decide how long you want your back opening to be. (We're using the Lace Overlay Top in this video example.). Fuse both pieces together with your iron.

We've also sent you an email with this link for safekeeping. With right sides together, fold the bias tape lengthwise, sandwiching the rattail cording between the layers.

I also have used hand or machine quilting thread. You can simply do this by folding the button loop and gripping it closed at different points until you are happy with the size. Learn how to make this easy catchall on your sewing machine, by Saki Jane. 5. 4. If you are creating many rouleau loops, you may need to join a few pieces of bias tape to make a longer length.

To do this, place two strips at 90-degree angles with the right sides together, lining up the edges. Adjust the length of the loop (make sure your button fits through) and leave 3/8 (1 cm) tails for the seam allowance. It would save me from bookmarking separate pages and possibly procrastinating which, lets face it, is long. Haley writes tutorials and articles on our blog, and writes and edits for our magazine, Seamwork. Am I missing something? Use a straight stitch to secure one end of the bias strip to one end of the rattail cording. Why do you supply a pattern piece for the facing and then post these instructions also? Fear no more, this tutorial will show you how to create dainty thread loop button closures! I used it for belt loops on human clothing. You button loop is now ready but before attaching it to the back of your garment, you need to assemble the facing. Rouleau button loops are small loops made of cording. If you are struggling to turn it through, you can also take a think hand needle, make a few stitches close to the end of the tube and then guide the needle through the loop, before pulling the thread to turn it right side out (if you'd like more guidance on this technique, check out this tutorial from Tilly and the Buttons). Creative Pathways into FRENCH LILAC: Victore Pasmore, Helen Frankenthaler and PATTERN REVIEW: Capucine Bathrobe in Heavyweight Mix Natural Linen, Leena Ruffle Sleeve Dress Tutorial and Free Pattern. Fold both centre back seam allowances back to the inside of the top, and give the opening (along with button loop) a good press. Yes. We pay our respects to their Elders past, present and emerging. Usually, these come in a light/medium weight. Carefully machine stitch in place - a couple of millimetres from the crease (inside the centre back seam allowance). Dear Jackie, I guess I used a slightly smaller seam allowance, 5/16 or so. The Easy Way to Sew Machine Buttonholes- Freezer Paper! This fine closure takes the place of buttonholes and works well with lightweight or medium-weight fabrics. 12. Thank you sew much! sizing chartpattern skill scalefrequently asked questionsmaker storieswholesalestockistsshipping + returnsget in touchprivacy policyfree patternspattern errata. 1.

Very helpful.
3. Iron the fabric so it is easier to work with. A tiny button, we're using a 1/4" button.

Five years ago, Haley left the apparel industry to join the world of home sewing. 4.

Considered the King of the forest, it was associated with strength, nobility, longevity, inspiration and knowledge. Take the BUTTON LOOP piece and fold in half lengthways, with right sides together. Learn how to calculate your fabric's stretch percentage.
dress diy closure loop button sewing 
Now all that you need to do is to sew shoulder and side seams of your garment together and finish the neckline and the armholes. Press and pin. You can stitch at 3/8 or 1/4, it doesnt really matter. Make a cut in the middle and clip to (but not through) the stitched line.

Pull the rattail cording to turn the bias to the right side. 8. Lets say we go for 5 inches. Use a water-soluble marking tool to create a reference grid on the fabric. The loop should be pointing away from the centre back opening. Mark out a small rectangle (1 wide and 3 long (2.5 cm x 7.5 cm)) on the bias of your fabric, in other words, at a 45 degree angle to the grainline. Stitch along the long (raw) edge with a 1.5cm (in) seam allowance. Practicing this technique can help you approach sewing patterns that include tiny thread loops with confidence! If you think you would prefer to make a hand-stitched button loop, check out this tutorial for more guidance. Topstitch the facing following the curved shape of your pattern. Where do you buy it? Cest bien compliqu ..!

2.
An elegant closure can elevate an average handmade garment into a thoughtful one-of-a-kind piece. What type of fusible interfacing would you recommend, light weight, medium or heavyweight?
 closure button dress tutorial sewing shirt madeline zippers modern craftgossip
 By creating a reference grid, you will easily be able to create loops with consistent size and spacing. Thank you keep those new ideas coming. Newsletter! Sew diagonally across the bias intersection. Fold your rectangle in half lengthwise (right side facing out) and press. Press the facing away from the garment to open the seam. Sewing Glossary: How To Sew a Button Loop Tutorial, Creative Pathways into FRENCH LILAC: Victore Pasmore, Helen Frankenthaler and Tony Swain, Sewing Glossary: How To Sew Your Most Essential Four Pockets, Sewing Glossary: How To Sew Your Most Essential Four Collars, Beautiful Seasonal Colour With The Mighty Oak Tree: Dyeing Linen With Oak Leaves, How to make Linen Christmas Star Stockings Tutorial. Thank you! In this easy tutorial we are going to show you how to sew a back slit and add a fabric button loop for closure. Fold it again in half lengthwise enclosing the raw edges and stitch over as close to the edge as possible. However, when you have sewn it, the space between the sewn lines is much smaller than the two edges so what size seam allowance did you use each side of centre? Take your Button Loop piece, which should have been cut on the bias.

Today, in the Collins Top Sew-along, it's time to make the button loop for the centre back closure. Now onto the tutorial All you need is: That wasn't too bad, was it?
 button loop closure feedback answer question thanks did there
 Sign up for F|S morning newsletter that will help YOU with all YOUR sewing needs. Note: Prewash your fabric and tumble dry it until it is still slightly moist, dry in room temperature. Finish the garment according to the pattern instructions. Look for patterns with a wrap-style closure or a faced button placket closure, like these: 1. Do the same with the back panel of your garment and pin the two centers right sides together. And, thank you for all the wonderful tutorials.

Thanking you in advance. Thank You for this tutorial, will try it. Take the BUTTON LOOP and pin in place at the position marked in the previous step. Its important that you place it 3/8 (neckline seam allowance) from the neckline edge (otherwise your loop will be caught in the neckline binding). Trim the seam allowance to 1/8 and press open. Fold your facing in half to mark the center. In this tutorial, we added a rouleau button loop closure to the Laura skirt, but you can easily upgrade many patterns with this technique. Once you have the right size,put a pin through both ends of the loop to mark the correct size.
Sitemap 0