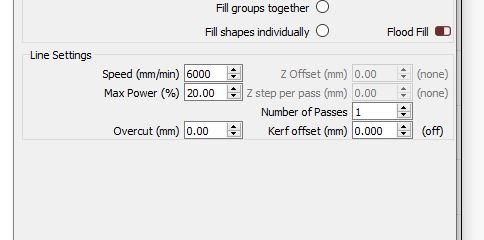
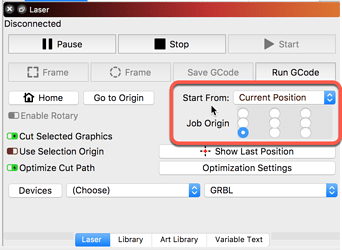
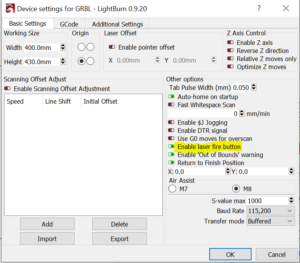
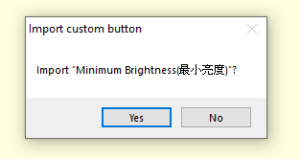
Machines that mount these lasers are generally cheaper and can be purchased for around $200-250. Followed all the advice I could. Confirm that the welcome message shows [OLF 187] as latest firmware. The firmware update procedure is now complete! Build, Test & Review techydiy. The press buttons are successful when ORTUR LASER device appears in This PC as a drive. A recent addition is ramblings about lasers and 3d printers. The laser fire button turns the laser on and off for focusing it.
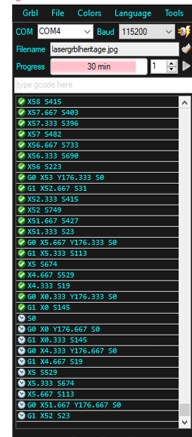
ortur These lasers are reserved for the top models and only appeared on the market from the beginning of 2022. With the previous laser if I had any overlap it would burn the previous line off the tile. Many users that experience the above issue reported that simply using a different computer allowed for the firmware update process to finalize without problems. Upgrading firmware turned out to be really easy. Set the baud rate to 115200 (shown below) and pick the COM port that you saw in the Device Manager for the laser. Allow you to engrave wood and leather and cut paper and cardboard, and small thicknesses of plywood and balsa (a couple of mm).
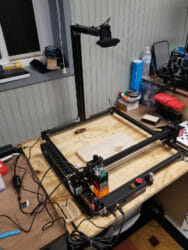
There are a very good sellers called Opt Lasers who do small productions but of the highest quality. I was instantly hooked. There is one detail that was not obvious with this webcam setup. If you notice in the picture above I installed a fixed webcam. I ordered and received a small pump to test out air assist with cutting. The simple workaround is to always close and reopen the connection between each burn. This software is frequently used with larger machines. They are all modules made by hand according to the best standards, all tested one by one and that can also provide personalized answers for any needs. The LM2Pro comes with a custom board with an STM32 microcontroller. Is it possible to cut up to 3mm of acrylic and 5mm of plywood (even more if combined with air assist system) with multiple passes. Also take note of the (COMx) port atributed to your Ortur. Probably a mixture of both. Produced by you or is it one from another setup? This will open up the material database and use the options for the material selected.
ortur Its not nice to spend some money and feel abandoned when there is a problem with the product! Ill also go through some of the basic usage of LaserGRBL. These cookies do not store any personal information. The rest of the settings can be selected using the small book icon near the engraving speed.
First I will share my experience installing an upgrade module, Unboxing SunFounder TS7-Pro touchscreen display SunFounder TS7-Pro is a 7-inch touchscreen display designed. Please click Accept Cookies to continue to use the site. Laser modules are available ranging from optical power from 2W up to 15W (equivalent to about 60W of electrical power). Later on I will be posting a guide on using LightBurn, and I will link it in the intro to this article as well once its up. I spent weeks with a 3018 and a 2.5w laser trying to make it work. Examples of this category are Scuplfun S9, Atomstack A5, Aufero Laser 2 etc. If neither solution above was successful, please get in touch via our Ticketing system at. Please temporarelly disable the security software and attempt firmware upgrade procedures a second time; Use a different computer. I didnt notice it with the very thin first test above. About 9 months ago YouTube channel 3dPrintFarm posted a video about etching ceramic white tiles. This is the Neje 3 MAX with 10W laser that has a very competitive price (considering it has the drag chain).
imprimante ortur Some more solid and robust models use double-size metal rails, like the FoxAlien Reizer. Ive cut 3mm plywood in a single pass at 240mm/min without burning it. Hello Karl I was reading your review and found it very informative. Nicky Norton was the originator of the process but this was the first time I had seen it. LaserGRBL is able to load any image, pictures and logo and send to your laser engrave with few click. This is a permanently marked 4 white tile.

This will also turn on the laser to a low power level in order to visualize on your material where the engraving will be.

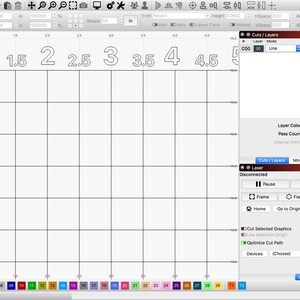
I assume that this is super simple to fix. In the first part of MECOOL KP1 smart projector review, I checked out the package content, projector design, Karl here and I will keep this short for you. Continue reading Laser focusing on Laser Master 2 Pro and optimal line spacing. I finally gave up. This can also be seen from the GRBL Configuration menu option. All well-known brands provide at least one model based on this design, but they are not all the same: for example some brand use plastic parts while others are full-metal design.
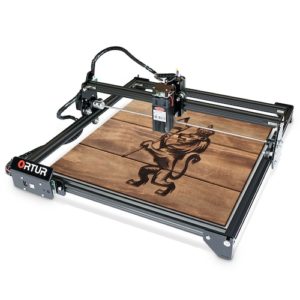
The calibration is based on a fixed length between the webcam and the burning surface. Then check your console to make sure it reflects the new firmware version. This will reset the machine coordinates, but not the zero point. Ive read somewhere a comparison with LEDs where its done similarly, whileRead more , Thanks for the info. In my case the line is horizontal, meaning that the hash patterns Im using to avoid burning dont work anymore and that up to 2/3 of the vertical surface is left untouched (the line is even getting smaller than the motors physical resolution). VAT) Suitable for MM and MC cartridges Precise, Your email address will not be published. This covers the basic usage of LaserGRBL with the Ortur Laser Master 2. In the future, I would split this image apart and burn each wood individually to get a consistent look.
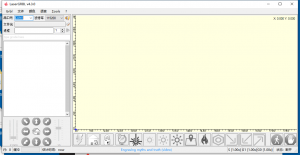
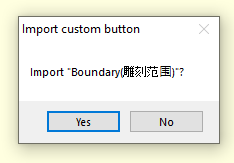
Important to NOTE: any customization on the GRBL settings will be overwritten. The smallest I have is an old 1W one which is roughly a 50um dot. Get the latest info updates and exclusive promotion code. Within 30 days of receiving the product, if you are not satisfied, please contact us and solve the problem in the first time. Unlike other GUI, LaserGRBL it is specifically developed for use with hobbist laser cutter and engraver and could be a good free and easy alternative to picengrave, benbox, T2laser, lightburn for who dont need more then a simple and effective tool. Ramblings about my escapades into building servers, running services, and breaking software. After installing the driver, plug in the USB cable to the laser and power it on. I suggest to focus your research on the well known brands, because unknown brands hardly offer quality products and after-sale support. I did all the previous burns at .1 I think I can get quite a bit smaller and make a custom cylinder for focusing.but then it increases time considerably. LaserGRBL is one of the best Windows software for image Laser Engraving. Depending on how accurate the button presses are performed, this operation might need to be repeated. Especially, after spending so much time trying (and mostly failing) with the previous laser setup doing the Norton tile method. If your surface is raised it throws the calibration out. What I was seeing in software and what was burning was not lining up. There is a 30-day unrestricted trial. Keep the Ortur Laser Master 2 PRO S2 in Off and confirm the emergency switch is NOT engaged; From the extracted/unzipped folder drag and drop onto the ORTUR LASER drive the file ESP_OLM2_PRO_S2_187.bin. Only 1.8x series firmware files are accepted. These are LaserGRBL and LightBurn. Keep the Ortur Laser Master 2 PRO S2 in Off and confirm the emergency switch is NOT engaged; Without releasing the held POWER button, after 5 seconds elapse, tap. It will take the head back to the machines universal zero point (hitting the X and Y limit switches). After instalation, restart your computer and check again if your machine is recognised as a STMicroelectronics Virtual Com port.
lightburn ortur The arrow buttons move the head to predefined locations (edges of each axis as well as each corner). LaserGRBL is compatible with any engraver based on Grbl v0.9 and Grbl v1.1 standards. I suggest you which parameters to check for the choice of your first laser engraver.
ortur lasergrbl 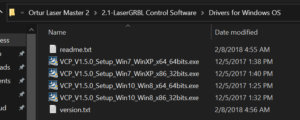
I got about 3 decent tiles. There are two main options for the Ortur Laser Master 2. Building the machine was relatively easy. Select the appropriate serial port for your Ortur Laser Master 2 PRO S2 and wait for the Connection status READY; Unzip the downloaded file using Linux, PeaZip, 7-zip, File Roller or any unpacker program compatible with your Linus distro; Connect your Ortur Laser Master 2 PRO S2 via USB directly to your Linux Machine do not use USB Hubs. Open the Run dialog box by pressing and holding the Windows key, then press the R key (Run)2. While preparing laser engravings and cuts, the laser power level will be set for that cut/engrave, so it isnt necessary to use these buttons often. For the first month, they are running a promotion and the first 5 orders every day will get a free rotary tool.
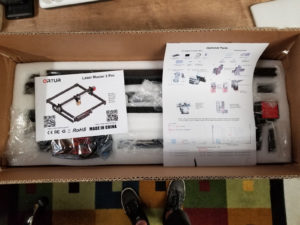
Their production includes air-cooled and water-cooled laser modules, magnetic quick attach and release systems, and many more! Laser engraver market is full of products: some of excellent quality, others of very poor quality. On mine I still have to release the screw that holds the module and adjust it by hand, which is less convenient. It took about an hour to fully build.
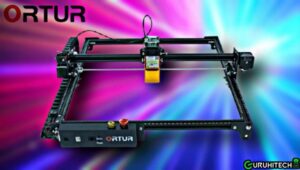
It gives good resultsRead more , So I received my 40W (15 real) NEJE module. These models are generally more expensive ($500 for 10W up to $900 for 20W machine) but they are the only ones that achieve truly comparable performance with CO2 lasers while maintaining incomparable compactness and manageability. Their low power has the advantage of having a smaller focus point, allowing them to engrave with the finest level of detail. Here you can find a list of brand which I have personally tested, and I can recommand.For each brand I did a review, and you can read my opinion about their product line.
I found the LM2Pro easy to assemble. This wont be comprehensive but should get you going. Pay close attention to which focus lens they mount: it is important that they mount a FAC (fast axis collimation) lens.
ortur perfette incisioni guruhitech sconto on Ortur Laser Master 2 Pro laser engraver First impressions. Im curious to know where you got the mount for the camera. The most difficult time I had was installing the timing belts. The Ortur Laser Master 2 PRO S2 is ready to be used normally. The board will show up as a drive on your machine. My first impressions are great. Step 2 Enable Firmware mode on your Ortur, Step 3 Confirm Firmware was written correctly. If GRBL is ever updated you have to wait for Ortur to provide firmware files and on the other hand, they seem to do a lot of testing and tuning. New Users Get $10 Off For Your First Order.
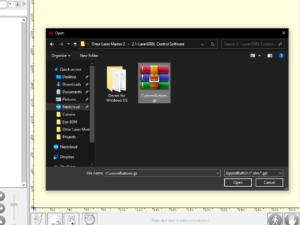
Navigate to ORTUR LASER drive and ctrl click and press Paste Item; (Command + C and Command +V will also work). Disclaimer: The link above is a commissionable link. Very important are also some details such as the presence of cables guides (drag chain) which prevent cables from bending under the laser head, burning and damaging the machine; and the presence of limit/homing switches. Documentation is claiming the old laser module was .23x.23 and the new is .08x.15. Yeah I can imagine. Air assist system are made of a high pressure pump and a thin nozzle that create a direct air flow towards the laser ablation point. This contains the settings provided by Ortur for various materials and various laser diodes.
This confirms the update procedure was successful. Even at 25% I draw on anodised aluminum at 0.075mm precision, and the anodisation is totally removed, leaving a nice silver white. This article will be going through the LaserGRBL setup while Ill be doing one in the future going through the LightBurn setup.
G-Code is the common name for the most widely used numerical control (NC) programming language. Ortur Laser Master 2 Software LightBurn, Ortur Laser Master 2 20W Engraver. The whole diode is adjusted up and down with the LM2pro which causes a problem with calibration. Ortur Laser Master 2 Pro S2 LF Laser Engraver, Ortur Laser Master 2 S2 Engraving Machine, Ortur 32-Bit Motherboard Laser Engraving Machine, Customer Service : mellgao@orturoffice.com, FREE SHIPPING ON ORDERS OVER $99.99 WORLDWIDE, NOTE: Although not always necessary its important that the drivers for the STMicroelectronics controller are installed correctly in your system for propper operation (only required in Microsoft Windows systems).
I have only had 1 experience with a diode laser and that was quite a long time ago and a lot has changed in the desktop laser department.
ortur engraver There has already been an update to firmware that I was hoping to fix the issue above but it did not.
The Ortur uses LaserGRBL as the main control software out of the box while LightBurn is a commercial offering that costs $40. I reported this to Ortur through its website and I am optimistic Ortur will provide an update to resolve this. These machines are able to easily cut thicknesses of 10mm with a single pass. Keep the Ortur Laser Master 2 PRO S2 in Off and confirm the emergency switch is NOT engaged; On the front of your Ortur Laser Master 2 PRO S2 motherboard press the following sequence of buttons: Press and Hold the POWER button for 5 seconds.
Sitemap 28