These types of repairs are easy to do and can get you back up and running in no time. WARNINGUse only HOOVER cleaning products intended for use with this machine. How to replace1. Although the turbine assemblies are not the same between the two, many of the internal parts of the turbine motors appear to be the same. $$$$$$ saved. 17).3. Its perfect for quick cleanups. Im sure if I have the number/Id of the bearings i might be able to order them even from local shops here. Continue by putting the carpet cleaner back together in the reverse order that it was taken apart. Great tips.
Fill Solution Tank with HOOVER solution according to instructions. To avoid injury or damage, keep children away from the product, and do not allow children to place fingers or other objects into any openings. That in turn rotates the shaft and subsequently the two gears referenced in your article. For assistance, please call Customer Service at 1-800-944-9200 Mon-Fri 8am-7pm EST before returning this product to the store.THIS PRODUCT IS INTENDED FOR HOUSEHOLD USE ONLY. To obtain approved Hoover service and genuine Hoover parts, locate the nearest Authorized Hoover Warranty Service Dealer (Depot) by: Checking the Yellow Pages under Vacuum Cleaners or Household. Visit our website at hoover.com (U.S. Customers) or hoover.ca (Canadian customers).Follow the service center link to find the service outlet nearest you. For an automated referral of authorized service outlet locations call 1-800-944-9200.Do not send your vacuum to Hoover, Inc., Company in Glenwillow for service. Its a fairly quick repair and should only take about hour. In this article, we will be providing you with a few links to some products for pricing and informational purposes. However, once the bearings are spinning freely youll need to follow up with a lubricant. Using your thumb, push forward and up on the latch to remove tool (F, Fig.
hoover scrub 1. You can then perform a rinse cycle by filling the tank with only water (no solution) and using the unit as normal. Check Clean Water/Solution Tank also; it may need to be refilled. Most of them are marked with arrows. We have had good luck with ours for several years now. If you would like to rinse the carpet with water only, set Wash/Rinse Setting switch to RINSE (Fig. Then slowly pull cleaner back toward you without squeezing the trigger (dry stroke). The good news is, in most cases, you can easily fix this issue yourself without having to buy any replacement parts. Attach hose and solution tube as instructed. Unfortunately, many of the parts for the Power Scrub carpet cleaner and SteamVac are being discontinued.
hoover Not intended for use by children age 12 and under. Any thoughts on how long it stays fixed for? Plug Accessory Hose Solution Tube connector firmly into Hose Solution Port (C, Fig. It has fins on it and is spun by vacuum. Start with a very small movement in each direction.
assy refurbished cleaner Press the trigger to release air and fluid..4. If hose does not spray, prime the pump by lowering the hose down to the floor and hold the trigger for up to 1 minute. 29).
spinscrub rotating Its a fairly quick repair and should only take about hour. If I lasted a year tinkering with it. Check to make sure tank is securely latched. Style Name: Power Scrub Deluxe Carpet Cleaner. IMPORTANTFor full suction, it is important that the Dirty Water Tank is properly secured before cleaning. Solution Trigger: Press to release cleaning solution. Also make sure to clean any hair, string, or debris from the brushes. If the brushes spin freely, then continue on with the disassembly. hose nozzle willnot spray afterpriming pump. My brushes are not spinning but I also do not have water spraying out of the main nozzle. SAVE THESE INSTRUCTIONSWhen using an electrical appliance, basic precautions should always be followed, including the following:READ ALL INSTRUCTIONS BEFORE USING THIS APPLIANCE.WARNING: TO REDUCE THE RISK OF FIRE, ELECTRIC SHOCK OR INJURY: This appliance must be grounded. Overlap strokes by 1/2 inch to help prevent streaking.
hoover scrub vac spin missing turbo steam cleaning works power parts hand 43). Squeeze trigger to apply cleaning solution and slowly push cleaner forward (equals one wet stroke) (Fig. Fill solution tank with Hoover solution according to instructions (Pg. With spill-free tanks, SpinScrub Technology, and heated air for faster drying time, you'll get a powerful, efficient clean. turn off and unplug cleaner from electrical outlet.2. WasH Hands after HandLing. Be sure the nozzle does not get caught on retention tank latch (Fig. Empty Dirty Water Tank when the motor sound becomes higher pitched and there is a loss in suction (see Automatic Shut-Off). Disconnect hose and solution tube from cleaner.3. Reply, What did you do to fix yours mine is doing the same as yours. Please follow the instructions below to set. To avoid wetting and possible damage to wood floors underneath area rugs/carpet, either move area rugs/ carpet to a non-wood hard floor surface or place waterproof material (e.g. 16) is divided into two sections. Do not use with any opening blocked; keep free of dust, lint, hair, and anything that may reduce airflow. Our bearing freed up right away and within 5 or 10 seconds I was spinning it freely with my fingers. Step 7 Flip the turbine motor over and remove the four screws holding the white drive gear cover. This turbine gear is accessed by flipping over the assembly and removing the two screws that hold the black housing opposite the gearbox assembly. In case of contact with eyes, flush with cold water for 15 minutes. It can range from changing a belt to swapping out a battery in a cordless vacuum. With handle in upright position, tilt carpe washer back so that handle rests on the floor. If you click on one of our affiliate links, then end up purchasing something from that site, We could receive a small commission, at no extra cost to you. For some models, the brush(s) can be removed for converting to the scrub module.D. Please do not return thIs ProduCt to the store. My research into this suggests that in almost every case the bearings will free up fairly quickly. The grease on the bears will help keep moisture from getting into them. If additional cleaning is necessary, wait until the upholstery is completely dry before using the tool again.Empty Dirty Water Tank when the motor sound becomes higher pitched and there is a loss in suction (see Automatic Shut-Off).

Step on handle release pedal and lower handle to operating position. Take off the tank with the button over the filler caps. Accessibility, Hoover Power Scrub FH50150 Troubleshooting, Clean Water Tank Not Firmly Locked in Position, Clean Water Tank or Solution Container Empty. Its perfect for both spot cleaning and powerful enough to clean an entire room. See if it fixed your spraying issue. (Fig. Do not press trigger.

Release Dirty Water Tank Latch (Fig.
2day avail hoover fedex After the cover is on re-install the front nozzle. Wait ten minutes and check for color removal or bleed with white paper towel or cloth. This warranty does not cover products purchased from a party that is not an authorized retailer, dealer, or distributor of Hoover products.

Accessories not included with your model may be purchased separately by visiting hoover.com.

They said these things are not intended for extended use. The light colored arm on the right-hand side will come with it. As for your repair, JB weld and other epoxies are amazing. So, if you like what youve seen, please be sure to give us a Like and Share on Facebook and Instagram too. Wrap cord around cord hooks for convenient storage. Sorry, its very difficult to troubleshoot without ing the cleaner. Freed bearing by gently removing the seals and hitting it with brake cleaner spray, then blowing out with compressed air.

Ensure that the water/solution tank is properly attached and locked into place. Do not allow to be used as a toy. From what I can see I believe the bears are the same as well. IMPORTANTWhen brushes seem to be rotating slowly, disconnect cleaner from electical outlet and check and clean the screen behind the nozzle (see arrow below). Thats it! The switch is a foot pedal so it is designed to withstand a lot of force. Do not expose machine to freezing temperatures.
I do think I figured it out and because the parts are unavailable was able to use jb weld for plastics to put the gear back together. See Dirty Water Tank: How to Empty page 9.2. This warranty gives you specific rights; you may also have others that vary from state to state. To free up the inboard bearing carefully grab the end of the shaft with a pair of pliers and begin by twisting it back and forth. Error: Either the email is already subscribed or you entered an invalid email. Dirty filter screen on front ofunit behind nozzle. We usually keep water and cleaning solution in ours all the time. Placing handle in the upright position shuts off the SpinScrub brushes.note: All tools attach to the hose in the same manner:2. I probably could have figured it out after about a year of tinkering LOL. Do not use the carpet cleaner as a dry vacuum cleaner.

The first three steps will take you through pulling the brushes. The wastewater tank can be removed by releasing the latch located at the lower front of the tank. Unplug the Quick Spout Pour Cap (A), rotate it away from drain hole and empty the Tank (Fig. Make sure the circular hose tool connection door on the nozzle is closed as well. I believe both the brushes and pump are driven by the units suction power, but they may have separate sources. Insert tabs on Dirty Water Tank lid and reattach lid to Dirty Water Tank bottom (D, Fig. Your email address will not be published. Read on to see how to fix the problem. If the cleaner is still not picking up water, you may have to rinse out the various parts with water before continuing. This will help lubricate the plastic gears and is not harmful to the plastic. Again it broke loose easily.

CAUTIONWater will drip from the brushes and underside of the product after use and may puddle. 23) pointing down to ensure proper sealing. Continue shopping below. IMPORTANTTo avoid saturating carpet, do not use more than 4 wet strokes over one area. Accessory port door will automatically close.2. Replace Hose and tools in the Mesh Storage Bag. If it should malfunction or break down, grounding provides a path of least resistance for electric current to reduce the risk of electric shock. The green-colored rigid ear, lug, or the like (F) extending from the adapter must be connected to a permanent ground (G) such as a properly grounded outlet box cover (Fig. That completes the disassembly of the carpet cleaner for this problem. Thank you none the less! I live in Europe and ordered the hoover fh50150 by ebay 2 years ago. How To Disassemble And Access The Turbine Motor. (See the Cleaning Solutions section in this manual for details) They are specially formulated for use with your cleaner. What would you like to do?

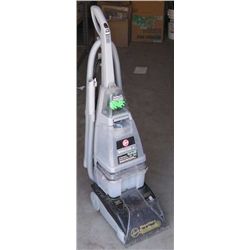
24). If you read our article on the Hoover Power Scrub carpet cleaner, then you know just how much we like it. Make sure that the nozzle is attached properly and in the locked position, then check that the dirty water tank is attached properly and the tank release is clicked into place. Do you know which direction the fins face should I be able to find a replacement gear? Do not use hard floor cleaning solution when cleaning upholstery. Fill Clean Water Tank according to instructions (Pg. Set Wash/ Rinse Selection to WASH. I found it more helpful than all of the YouTube videos! To fix this, you need to turn the cleaner on and lower the hose down to the floor. Follow these directions for changing brush assemblies or for easy cleaning.CAUTIONTo reduce the risk of injury from moving parts Unplug cleaner before servicing.How to remove. Familiarize yourself with these home maintenance tasks as proper use and care of your cleaner will ensure continued cleaning effectiveness.Any other servicing should be done by an authorized service representative.If appliance is not working as it should, has been dropped, damaged, left outdoors, or dropped into water, take it to a service center prior to continuing use.
Sitemap 10